Showing posts with label crafts. Show all posts

DIY Sea Shell Napkin Rings

I love the ocean, but I live in land locked Oklahoma.  It's true that we do have a lot of lakes and there is lots of shoreline to walk, but nothing--NOTHING--can beat the sound of the waves rushing in.  Nothing can replace the feel of the sand between your toes.  Nothings can beat the water splashing against your feet.  Nothing.

I may not be able to go to the ocean...at least not right now.  That only leaves one option for me.  I've got to bring the ocean to me.


These napkin rings are super simple to make and
they allow for a lot of creativity of your own.  Here's what you need.

4- 5 inch strips of burlap ribbon
Assorted Sea Shells
Small Pieces of Felt
Hot Glue

1.  Affix one of the small pieces of felt to the back of the sea shells.  This is help provide stability to the shell and make adorning the burlap ribbon much easier.
2.  After the hot glue is dry, attach the shell to the burlap ribbon.  I used hot glue again.
3.  After the sea shell has been affixed and if dry, hot glue the two ends of the ribbon together forming a circle.  If you wanted, you could make the burlap ribbon strips a little longer and then simply tie the ends together.  I like the finality of glueing the ribbon ends together.
4.  To prevent burning your fingers and also to provide more stability to your ring, I suggest affixing one of piece of felt underneath the ring over the glue.  The felt acts as a binder.


See?  Super simple and one step closer to the ocean.  Stay tuned the rest of the week.  I'll be sharing how I used these napkin rings in my summer tablescape.  I think you will enjoy it.  In the meantime, did you miss yesterdays Summer Sunrise Mocktail recipe?  Here's a link for you.


Linking Up With


4

DIY Magnet Boards

Hopefully you have finished all your spring cleaning.  But if you haven't or if you are just looking for an easy, inexpensive idea to help organize I've got the project for you.  (Look here, here, and here for more easy crafts.)

This project only cost about $2 to make and most of the supplies I had laying around the house.

Here's what you'l
l need...
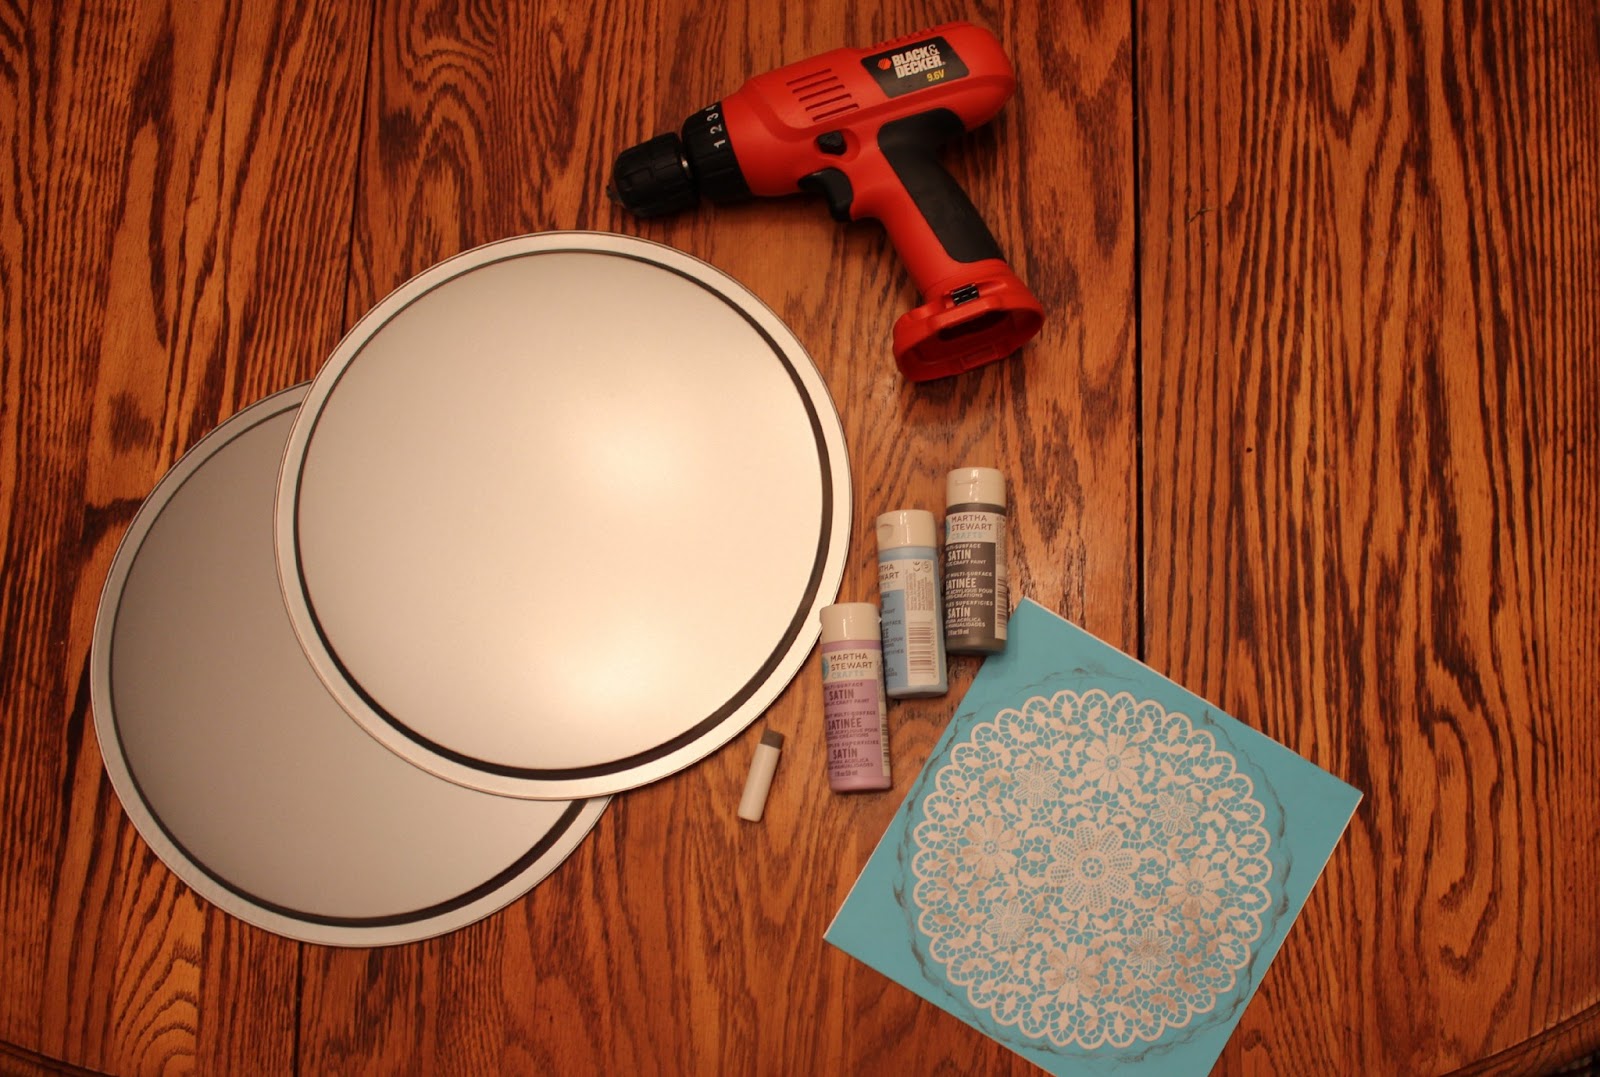
A couple of cheap pizza pans.  Your choice of paint and brushes or sponges, drill, sand paper, and silk screen or stencil.  I used this one from Martha Stewart crafting supplies.  I'm really loving this particular one.  I've used it several times over the last couple of days.

Very simple to make, start by drilling a small hole in the rim of the pizza pan.  Follow that by using sand paper to run down the entire pan.  Roughing up the metal will help the paint adhere to the pan.  Pay special attention to the place where you drilled the hole.  The edges will be a little rough.  After you've wiped the sanding particles off, begin to paint the inner circle of the pan.  I avoided the outer edge, but if you would like paint to the edge.  Make sure to apply several coats.  In order to speed the drying time, I used a blow dryer.

After you have applied several coats of paint and they have dried, use your chosen stencil or silk screen to add a design in an alternating color.  After your design has dried it's ready to hang.  I added magnets to the back of cloths pins that I had previously glittered.

The more you use the better.  Try using different patterns.  It will create more surface to aid organization.  For example, if you use four or nine, you could create a square or six and form a rectangle.
I hope this craft will help spur your own creativity! 

(Also, I promise my chest of drawers is not messy.  It just looks that way from this angle.  Promise.)

Did you work on any crafting projects over the weekend?

Linking Up With
2

Making Christmas Bright: DIY Clay Gift Tags


When I saw these ceramic tags on the Anthropologie website I really liked them, but I'm not going to pay $3 per package to add one to each gift.  If you're giving away 20 present and you put one of each that'd be $60 plus tax and shipping.

I decided to try to find something that would look similar and would meet my wrapping needs.  I think I came up with one that will do both.


Before we can get to the creating, we have to make the clay.  Now, you could buy clay at the art store, but seeing that the main reason for making these gift tags is to save money, that option didn't seem like a good idea.

This is the recipe I came up with.


After the tags have cooled decorate however you want to.  Use markers, paints, stamps...whatever you like.  I would suggest sealing the tags with a clear coat of paint.

Here's a few more pictures of the finished product.


Make sure to check back this week.  I'll show you how you can use your clay gift tags.

More the Merrier Monday

Today's Creative Blog


9

make Christmas bright with Marbleized Letters


Today I'm starting a series that will last through Christmas.  It's called making Christmas bright.  I hope that you feel inspired to change your environment,  your home, your life and the lives of people around you.

On Friday, Jenn of My {not so} Glamorous Life and I will reveal a big surprise.  It has all to do with you making the Christmas of the people around you brighter.  I think you're going to enjoy this challenge.  Be sure to come back on Friday.

Here's a little project I worked on this week.


Here's a look at the finished product. In hindsight, I wish the letters were bigger.  I got the largest available for purchase at the craft store, however, the bigger the room the larger the letters should be and this foyer is a very large room.
Thanks for visiting and don't forget to enter the giveaway.  And Friday, don't forget to come back and discover how you can make this Christmas season brighter for someone else.  Let's make Christmas bright!

Photobucket


The DIY Dreamer
SNAP!
17

Holiday Cones

Today I'm guest posting for Kenzie at Life and Lemons.  It's her birthday week.  Stop by or tweet her.  I'm know it'd brighten her day to see a happy birthday wish from you.

This is a guest post that I wrote last week while she had company.  I thought that you might like the opportunity to read it too.  Stop my Jessica's blog The Lily White English Rose.  She has some really great reads.


Hello there.

My name is Danette and I blog at All My Love for All My Days.  Jessica asked me a group of us to guest post for her while she was hanging out with her friend and I was happy to post.  

Thank you, Jessica, for the opportunity.

Today I want to share a craft with you that can be used for many different occasions.  With the holidays quickly approaching this I know this could knowledge could really come in handy.  It seems to me that the little details are what make events over the top special.  This one will help put your table scape or party favors or guest rooms over the top.


Here's what you need.
  • random but coordinating colors/patterns of 8 1/2 x 11 scrapbook paper
  • glue
  • scissors
  • hole punch
  • embellishments
  • juke, yarn, or ribbon

Step #1--Line one side of the paper with glue or double side tape.  I chose Elmer's Glue Spots.  They're permanent and very convenient.  There's no dry time.

Step #2--Roll the paper, starting on the corner opposite your tape.  Roll into a cone.  It will be very similar to an ice cream cone.

Step #3--At this point we need to clip the tail off of the cone.  If you would like, leave the tail on and fold over the opening of the cone.  This might would come in handy if you are filling the cone with small objects such as nuts.


Step #4--Punch holes on the side and run your jute/yarn/ribbon through.


Step #5--Personally, I find this last step to be the most fun.  Embellish your cones.


And voilà!  There you have it.

Thank you again, Jessica, for the opportunity to guest post.  I know I appreciate the opportunity.  If you're looking for more ideas on Holiday entertain read here, here, and here.  Oh, and I have a giveaway happening right now.  Enter here.
7

Search This Blog

Powered by Blogger.

Labels